Nik Software Offers Daily Webinars

Many LexJet customers use one or more Nik Software products to quickly and creatively enhance the look and quality of their images before printing them. For example, Nik Sharpener Pro not only lets you optimize your detail sharpening for different types of output, but also includes a Soft Proof features that lets you accurately inspect the results on screen. This can save you the time and expense of making multiple test prints.

 If you aren’t yet familiar with Nik products, Nik Software is currently conducting a series of three educational webinars each day. Each webinar provides introductory information and tips for installing and using one or two of Nik’s products. The five products covered in the webinars are:

 Dfine® 2.0 for reducing unwanted imperfections (“noise”) while maintaining detail and sharpness;  

 Viveza® 2.0 for selective control over color and light in your photographs;  

 Color Efex Pro™ 3.0 for applying photographic filters that can enhance and transform images;

 Silver Efex Pro 3.0™ for creating professional-quality black-and-white images; and

 Sharpener Pro™ 3.0  for full control over the sharpening workflow, from RAW pre-sharpening and creative detail enhancements to superior output sharpening based on the output device.

 To register for these webinars, visit www.niksoftware.com/daily.

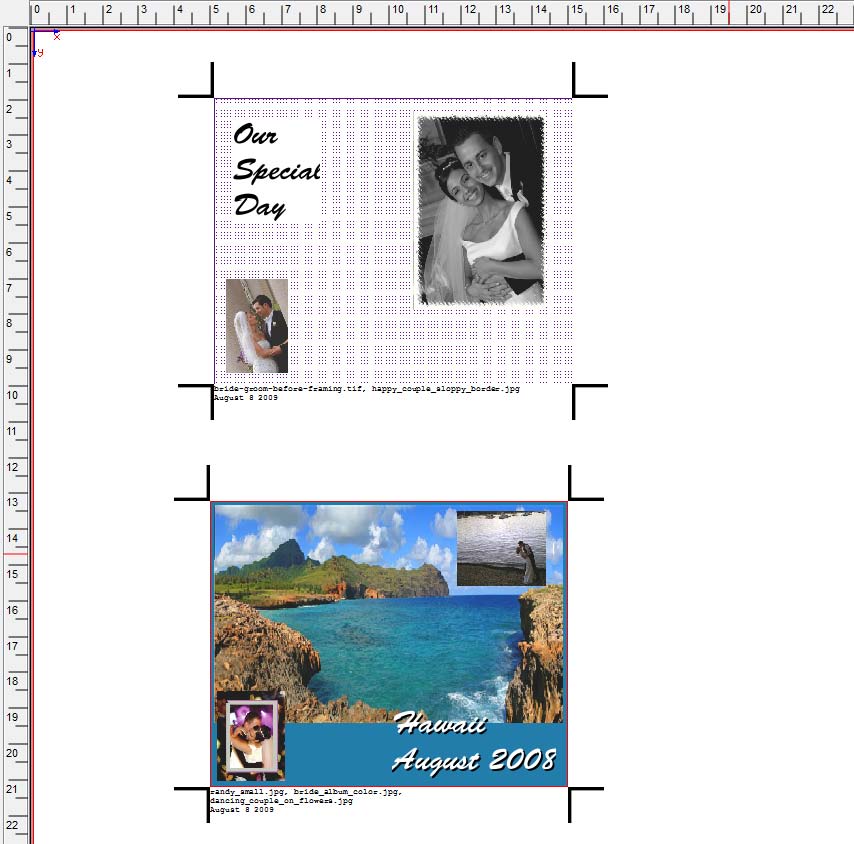
In addition to the daily product-related webinars, Nik is offering a series of webinars that show how to improve specific types of images, include portraits, wedding photographs, scenics and landscapes, and wildlife photos.

John Caponigro’s New DVD Explains Fine Art Digital Printing

By Eileen Fritsch

At PhotoPlus Expo last October, I sat in on an Epson-sponsored session in which John Paul Caponigro attempted to explain everything you need to know about inkjet printing in an intense, two-hour session. He covered an awful lot of valuable information, including the importance of printing your work and why digital printing is more than simply a replacement for historical processes.

So, I am pleased to learn that Caponigro has released a DVD entitled Fine Art Digital Printing in which he expands upon the topics he discussed in his session at PhotoPlus.

He emphasizes that in order to achieve the best possible print, you must understand all of the components involved in making a good fine art print, including the substrate, ink, printer, driver/RIP, profile, ink limit, print speed, viewing light, environment, and presentation. He discusses all these topics on the DVD, as well as the importance of scale, resolution, color management and proofing, output sharpening, and protective coatings.

Plus, he discusses potential problems that can affect the final look of your print, including bronzing, metamerism, gloss differential, and outgassing. Other topics covered include how to solve common challenges, and how to choose a printer.

I haven’t yet viewed this  DVD, but I was impressed with the thoroughness of Caponigro’s down-to-earth presentation at PhotoPlus Expo in which he previewed some of the DVD contents.   

Caponigro’s advice isn’t meant for photographers who want to learn how to efficiently print higher vollumes of photos for their wedding or portrait customers. Rather, it is focused primarily on printing finely detailed, long-lasting, exhibition-quality prints that lovers of fine photography will value.   

One thing I enjoyed about Caponigro’s style is that he presented the information in a way that can help you get the best possible prints from your current equipment, while also giving you a better appreciation of  what specific advantages new print technologies might offer as the equipment, inksets, and software continue to evolve.

The DVD can be ordered for $69.95 from Acme Educational, a site that promises “Industrial Strength Knowledge for the Creative Mind.”

John Paul Caponigro also offers small-group, hands-on digital-printing workshops in his studio in Maine as well as a collection of low-cost, dowloadable articles about specific aspects of printing including the aesthetics of printing, evaluating substrates, navigating the Epson Driver in Photoshop CS3, and a preflight checklist that can help you avoid common mistakes.

Printing Tips from the Canon Digital Learning Center

At LexJet, we’re encouraged to see the growing range of educational resources now available for photographers who want to print professional-quality images. We plan to start featuring some of those resources on this blog.  

For example: if it’s been awhile since you visited the Canon Digital Learning Center, check it out! In addition to providing excellent advice on shooting different types of photography, you can learn more about color management and how to print from Canon’s wide-format imagePROGRAF printers and 8- and 10-color PximaPro printers.

You can download a copy of this guide in Canon's Digital Learning Center.

The instructional resources highlight some of the lesser-known features of the printers. For example, the author of an article on how to create Custom Profiles for Canon Printers points out that if you’re printing a bunch of test prints and want to remember which settings you used for each print, you can print a label directly onto your test print.

“You can actually do this right in the Canon Print Plug-In when you export an image to print. Just go up to File>Export>iPF5100 Print PlugIn (for example).  Once exported, click on the Print History tab.” Then, click on Edit Comment to create a custom label that will output directly on top of the test print.

Another useful tip from this article on custom profiles:  Before you scan your printed test charts, let them sit in a dark, dust-free environment for at least 30 minutes after printing.

An article on Basic Color Management explains a profile this way: “Basically, a profile creates a mathematical equation for my monitor to communicate to my printer and produce as close to the same printer as possible. That is why calibrating monitors is so important.”

After briefly discussing the fundamentals of color spaces, the author asks and answers this question: “Which color space should you be working in with Canon printers?” For Canon printers, Adobe RGB is recommended because “You want to capture and work with images that are close to your output device as possible.”  

With Canon’s total input-to-output solution, you can capture images in Adobe RGB on your Canon DSLR and print them in a color space very similar to Adobe RGB on the Canon imagePROGRAF printers.

The Basic Color Management article includes other useful tips, including how to soft proof in Photoshop and see when your printer can’t reproduce some of the colors you see on the screen. This enables you to make the appropriate adjustments on screen before you waste time, money, and materials making multiple test prints.

If you want more information than is presented in the articles, you can download a 21-page Digital Color Management Guidebook for your Canon cameras and printers. Also featured in the Canon Digital Learning Center site is a series of podcasts that you can view on screen or download. The podcasts range from 4 to 15 minutes, and cover topics such as:

  • Basic Color Management
  • Custom Profiling
  • Media Selection
  • Printing from RAW using Digital Photo Professional
  • Setting up Your iPF5100
  • Setting up Your iPF6100
  • Image Optimization and Soft Proofing with Photoshop
  • Using the Photoshop imagePROGRAF Export Plug-In

If you want to learn more about the Canon iPF printers that LexJet sells, or have any specific questions that aren’t answered in Canon’s Digital Learning Center, please feel free to call a friendly LexJet account specialist at 800-453-9538.

Every week, we help dozens of Canon-printer users learn how to get the most from their wide-format imagePROGRAF printers, and we can help you, too!

ImagePrint 8.0 Is Now Available for the Epson Stylus Pro 7900 and 9900 Printers

Epson Stylus Pro 9900

ColorByte Software has completed the development of ImagePrint 8.0 RIP software for the Epson Stylus Pro 7900 and 9900 printers. The software is the first to incorporate a brand-new color-management engine that can fully utilize the expanded gamut made possible by the Epson UtraChrome® HDR inkset that uses 10 inks, including orange and green.

According to ColorByte, ImagePrint 8.0 users can anticipate seeing as much as 40% more color volume on the 7900/9900 compared to the Epson 880-series printers.

“You won’t see the benefit of our new color engine if you are printing 8-bit images or in a smaller-gamut color space such as sRGB,” explains ColorByte president John Pannozzo. “But for those who are willing to step forward and use new technologies such as 10-bit displays, ImagePrint 8.0, and Epson printers that use UltraChrome HDR inks, you will be able to print a wide range of colors never before possible.”

ColorByte has also announced that ImagePrint 8.0 is now available for the 17-in. Epson Stylus Pro 3880.

Use ImagePrint 8.0 to lay out notecards, album pages, posters, or displays

New Features in ImagePrint 8.0: If you aren’t yet familiar with this newest version of ImagePrint, check out the demos on the ColorByte website. Many of the new features can help you print a wider variety of sellable products, including photo books, art cards, posters, and canvas wraps. Here’s a brief recap:

Text: You can now add text anywhere on the page, using any font on your system. You can create text of any size or color-with or without a drop shadow.

Backgrounds and frames: When designing album pages or posters, you can add a solid or another image as a background. Then, you can frame and matte any image on the page.

Templates with backgrounds and artistic frames: Put a photograph behind your templates, or use a solid color. Every frame within the template can have its own colored background too.

Better crop marks and annotations: You can now see the crop marks and captions on the page—not just on the print.


The Boundaries feature lets you lay out multiple pages on a wide roll of media.

Boundaries: This tool makes it easy to divide your page into croppable sub-pages, making it efficient to print a higher volume of book pages on wide rolls of media. Once you’ve gathered all of the elements of a page layout (text, backgrounds, multiple images) and marked them with group crop-marks, you can easily move everything on that sub-page all at once. Everything within the area bounded by the group crop marks will keep their position on the sub-page.

Extended and mirrored edges for gallery wraps: If you are making canvas prints that will be stretch-mounted, ImagePrint can automatically extend and mirror the edges of the image to cover the sides of the stretcher bars.


A new spoolface:
ImagePrint makes it easy to monitor, edit, archive, reprint and cancel print jobs. It also enables you to control print jobs running on multiple computers and printers. With the spoolface, you can see which jobs are in the print queue and which jobs have been saved for future use. Job previews let you see a thumbnail of each file in the queue or archives.   

Use ImagePrint to easily create edges for gallery wraps.

LexJet is an enthusiastic reseller of ImagePrint software because it has helped so many professional photographers efficiently print high-quality images on a wide variety of materials.

ColorByte Software offers more than 27,000 profiles for 400 different papers, including LexJet’s own award-winning Sunset photo and art papers for fine-art and professional photographic printing. The color profiles are built for five different lighting temperatures, so that you can ensure that your fine-art photography will look its very best whether it’s displayed in a private residence or a gallery.

ImagePrint is also famous for its ability to preview and duplicate traditional darkroom techniques such as Selenium and Sepia toning on warm, cool, and neutral papers. Advanced image adjustment tools include split-toning (with preview) and Reverse Sepia and Selenium.

A demo version can be downloaded from ColorByte website. ColorByte also offers a 30-day money-back guarantee if you want to test the product more extensively without having “Demo” stamped across each printed image.

If you would like more information about ImagePrint software and/or the Epson 7900/9900 printers, please call a LexJet account specialist at 800-453-9538. Ask about special financing programs and other offers that make it easier to buy the Epson 7900 or 9900 with UltraChrome HDR inks.


Tip: Protecting Your Inkjet Printer from Static Electricity and Clogging

By Bill Weiser

SolutionsSignSmHave you ever been shocked when touching your inkjet printer?  Most likely this occurs in the winter months when you are running your heater and the humidity is low.  Other than being an annoyance, this is potentially dangerous for your printer.

Depending on the level of the static electricity being discharged, and the place where the discharge enters the printer, this little spark could disable a printhead or fry the motherboard.  In addition to the possible damage to your hardware, static electricity can also cause dust to collect on your paper that will create flakes and white spots on your prints.

To prevent static electricity from interfering with your workflow, you can do a few very simple things:

Run a humidifier near your printer and keep the setting at 50% relative humidity.  This will dampen the effects of static electricity, as well as keep your ink cartridges from drying out and clogging. (You may have noticed that you get more clogged nozzles in the winter than any other time)

Don’t place your printer on a carpeted surface.  If you can’t avoid this, place the printer on a rubber mat with enough  surface space for you to stand on while operating the printer.

Use the Static Elastic™ cord across your media to prevent static build up.

Use an anti-static glove, brush or cloth when working with static-sensitive materials such as polyester films.

If you have any questions about any of these tips, call me or any other LexJet account specialist. We will be happy to help you. Call 800-453-9538.

X-Rite Says Show Us Your Color Munki and Win Big!

Brand_CMPhotoIf you’ve had some fun monkeying around with your ColorMunki, X-Rite wants the world to know about it! From October through March, X-Rite will award monthly cash prizes to ColorMunki users who make funny, entertaining videos using a ColorMunki as a prominent character then post the videos on the X-Rite channel on YouTube.

 Every month, X-Rite will award cash prizes of $50, $150, and $500 to the creators of the videos that attract the most views.

ColorMunki Photo can be used to calibrate your monitor.

ColorMunki Photo can be used to calibrate your monitor.

All monthly winners will be eligible for the $2,500 grand prize that will be awarded at the end of the contest in March.

“Color Munki was designed to appeal to the most creative people on the planet—those who want to obtain accurate color from screen to print in the easiest way possible,” says Iris Mangelschots, X-Rite’s Sr. VP of sales and marketing. “We are looking forward to seeing a wide variety of funny Munki videos.

If you don’t own a ColorMunki yet, you can buy one from LexJet and get helpful, personalized advice on how to use it.  Developed with input from wedding, portrait, and event photographers, ColorMunki Photo is an innovative all-in-one color-measurement tool that allows you to get accurate color on your monitor and create custom profiles for whatever type of inkjet media you want to use on whatever model printer you use. You can also use ColorMunki to get accurate color on your projector, grab colors from your image library, and preview how the colors on your palette will look under different light sources.

ColorMunki can also be used to create profiles for whatever media and printer you choose to use to print photos.

ColorMunki can also be used to create profiles for whatever media and printer you use to print your photos.

For more information about the contest, visit www.ShowUsYourMunki.com

Print Providers Should Wait Before Upgrading to New Operating Systems

By Michael Clementi

CautionSignComputerLexJet helps thousands of professional photographers and entrepreneurs find new ways to succeed by using wide-format inkjet printers to diversify their imaging businesses. So, we really like talking to people who are eager to try new things. But whenever new operating systems come out, we must provide a friendly reminder to our customers that sometimes it pays not to be an early adopter.   

Before investing in the latest and greatest operating system from Microsoft and Apple, check to make sure that it will be compatible with every frequently used piece of software on your computer—especially printer drivers.

We have already learned that some printer drivers aren’t yet fully compatible with the recently released Snow Leopard OS for Mac.  It’s also possible that older versions of commonly used printing and photo-editing software won’t be compatible either.

Before making the move to a new operating system, check the printer manufacturer’s website to make sure that updates are available. And do the same with the software that you rely on most often in your daily operations

A good rule-of-thumb is to wait at least six months after a new operating system is released to make the switch. This will allow all the kinks in different workflows to be worked out and give software and hardware companies time to update their drivers and versions. 

It will also save you from having to spend valuable time on the phone with the customer support departments at various companies.